| Author |
P910 disassembly and painting FAQ (lots of photos) |
knight4led
Joined: May 27, 2004
Posts: > 500
From: Califonia, USA
PM |
Taking the P910 apart:
______________________________
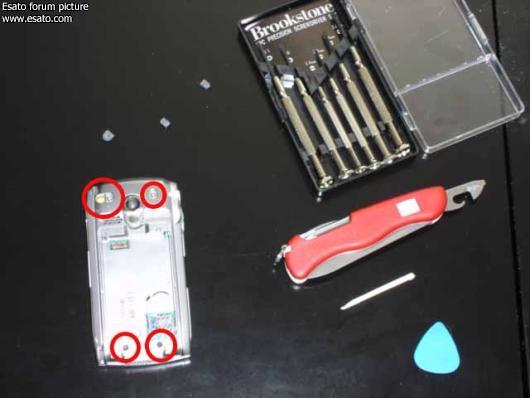
Supplies:
-Small philips (+) screwdriver
-a guitar pick or other thing, but sturdy tool for wedging into cracks
-a small prying tool (I used a swiss army toothpick)
note: I chose plastic items for the prying tool and and the wedging tool because they are less likely to damage the phone
Preperation:
remove everything that can be removed from the phone. This means take out the MS, stylus, battery cover, battery, keypad, keypad cover and SIM. The all just get in the way and can possibly break if left in.
Step 1:
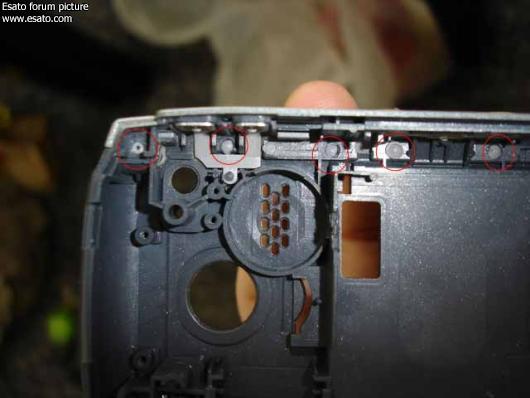
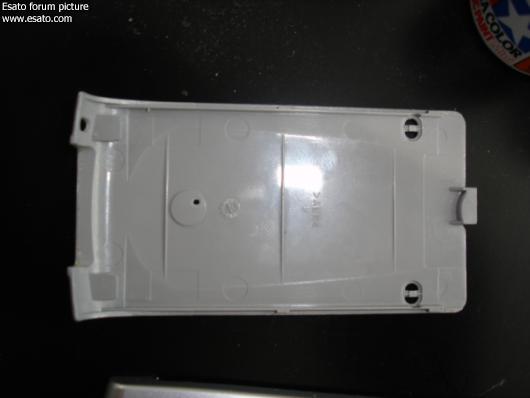
Use the prying tool pop off the covers of the two top screws on the back of the phone. After they are removed unscrew all four screws and note that the bottom screws and top screws are not the same length. I have circled the location of all four screws in red.
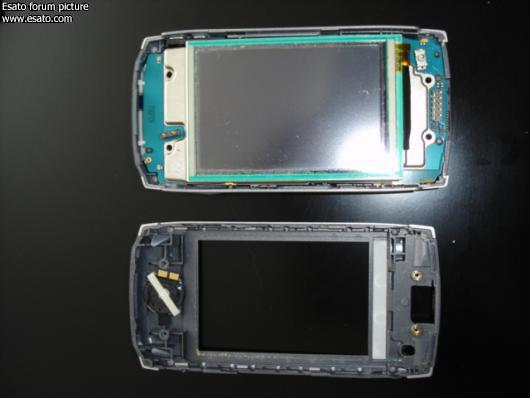
Step 2:
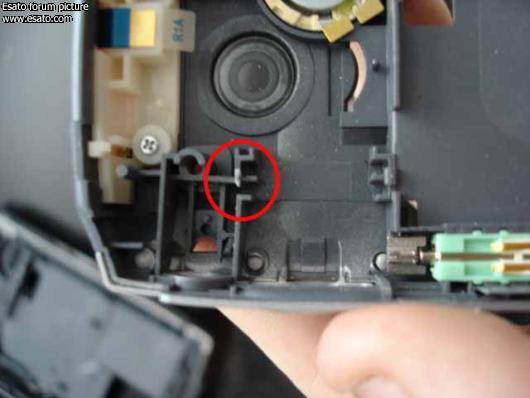
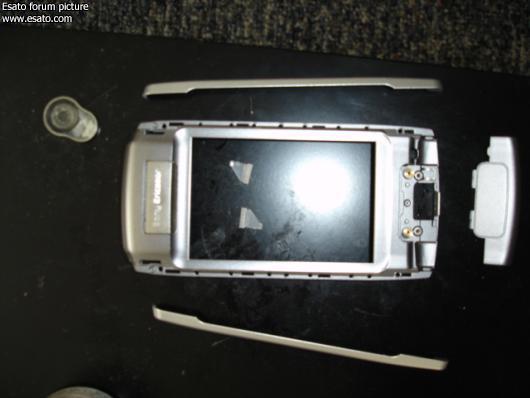
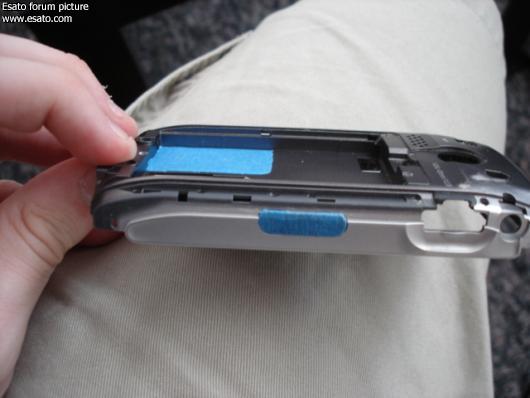
slide your prying tool between the silver pieces on the side of the phone. We want piece closer to the front of the phone because there are a few clips under there.
[img 002]
slowly slide the wedging tool along that crack on both sides of the phone and this should allow you to lift the front cover off of the phone. Be sure to lift the cover from the bottom to the top since there are more clips at the top.
Step 3:
Very carefully lift the screen from left to right. Under it you will find a large metal plate with two screws in it.
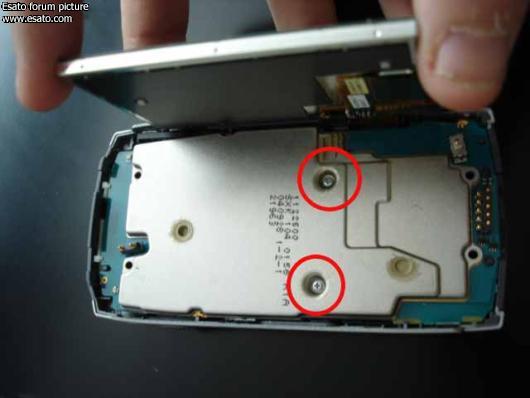
carefully remove these screws while holding the screen up.
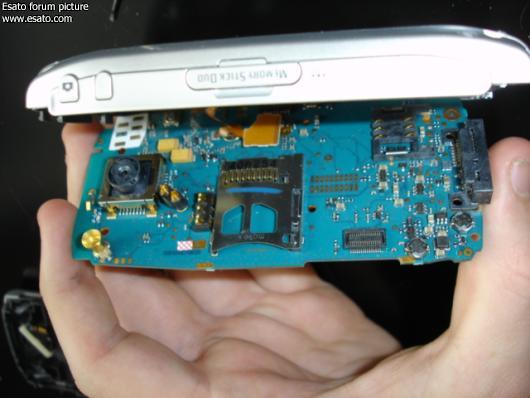
Step 4:
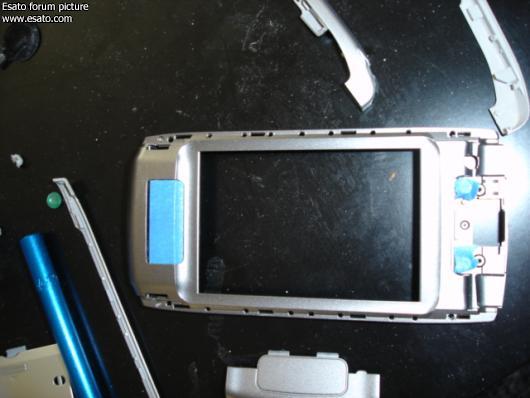
In order to remove the motherboard you must free it from a number of small plastic clips around the outside.This is made very difficult by the fact that the screen is still precariously attached via a thin ribbon cable (I've circled it in red). I started on the right side and then carefully freed the motherboard of its clips from right to left.
[img 006 copy]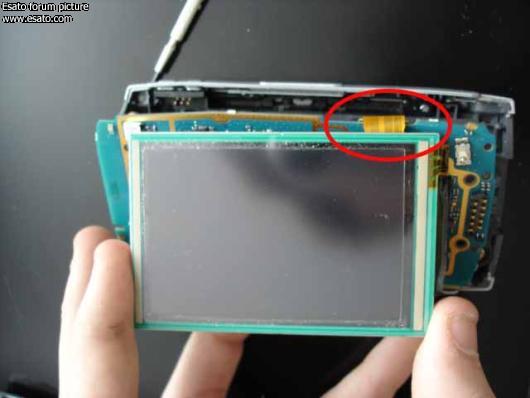
Be very careful in this step and do not attempt to fully remove the mother board yet. The jogdial is still attached underneath and could be damaged if you remove the motherboard without disconnecting it.
Step 5:
Carefully lift the motherboard from right to left enough to expose the screen connector on the underside. Carefully disconnect the screen and put it aside.I put it face down on the microfiber cloth that came with the phone.
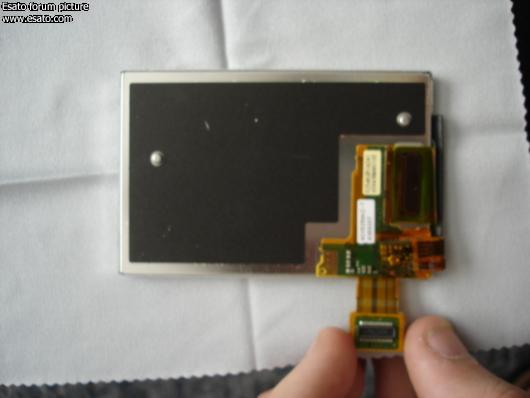
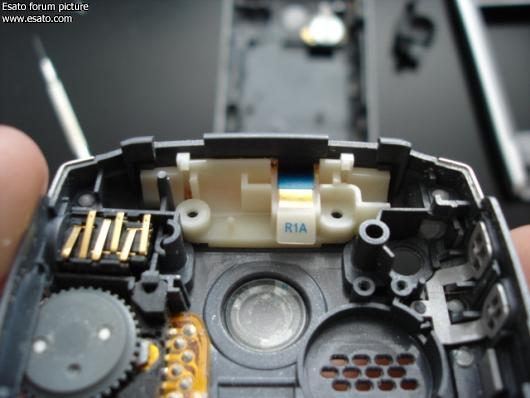
Now slowly lift the motherboard again and you will see another brown board connected just above the MS slot. This is the jogdial connector. Carefully lift this away from the motherboard.
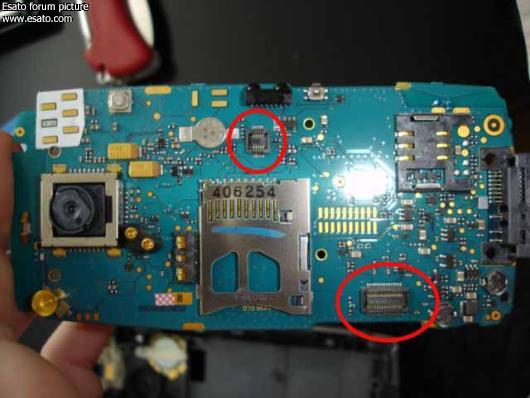
It is now safe to remove the motherboard and put it aside. For the sake of it I have a pic of the motherboard with the connectors for the screen and jogdial circled. Do not forget about these connectors when putting the phone back together.
Step 6:
Now you will remove all the parts that have been left in the front and back covers of the phone. Be careful not to forget about the speaker that is still in the front cover, I almost forgot about it because it is the only part in the front.
No tools are requred to remove the speaker, simply twist the little retaining bar and it should pop off. Remember the basic rule here is be careful.
The back cover is more complicated because some parts are held in by screws and some sit on top of each other.
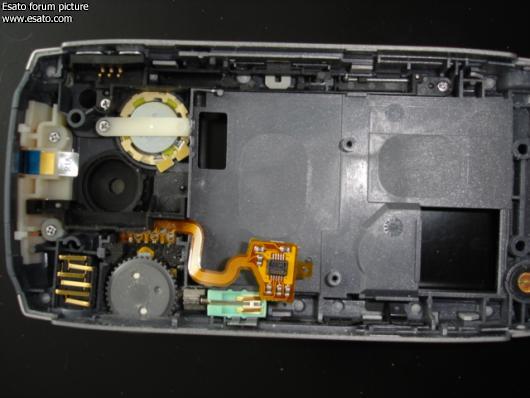
I removed everything in this order
-camera gasket (black rubber thing)
-stylus holder (long black thing on the right side)
-internal antenna (white thing screwed down at the top)
-vibration motor (green thing on the left)
-microphone screen (way down at the bottom, round screen on the left)
-headphone socket
-jogdial
a few notes:
the internal antenna is basically a copper sticker attached to the white thing and is easy to rip. Don't try pulling on the tab (labeled 1A on mine)
be careful when removing the jogdial. It is held in by some clips that are hard to manipulate and I wound up breaking one. Luckily it was on my old case
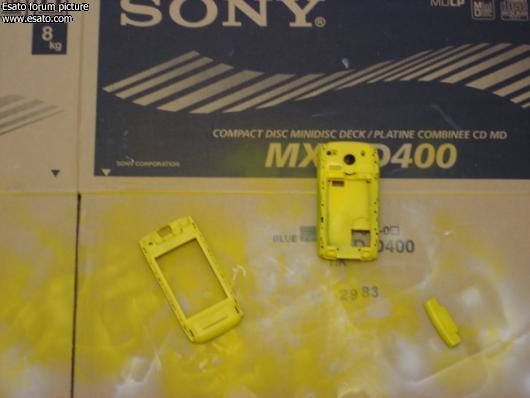
Now you are free to either put everything in a new housing or paint your housing. I have done both.
Painting the P910
____________________________
Tools
-Xacto knife
-masking tape
-paint (I used multiple colors and an airbrush)
Step 1:
get those silver colored side rails off by cutting away the little lumps of plastic that hold them in with your Xacto. I have circled them in this photo.
After cutting away all the little lumps remove the silver pieces by carefully prying them away from the top and working your way down to the bottom. You should start at the top becase there is a little catch on the inside that you need to release. This is true of the front and back.
note: I chose not to cut away the little lump holding in the side buttons or the power button and IR cover. I will mask some of that. Also there are a few little plastic lumps that you need to cut away that are tucked on the side near the bottom of the back cover. Don't miss these little lumps. Be cautious with the back rail that has the jogdial and headphone port, it gets very thin at one part and I actually cracked it, although when reassembled you can't tell.
[img 20]
Step 2:
Now we will remove all the little parts that won't be painted. These include the clear plastic pieces that the LEDs shine through, the rubber feat on the battery cover, the  logo on the battery cover, the camera lense and some mesh inside the covers. logo on the battery cover, the camera lense and some mesh inside the covers.
The little led pieces just slide out if you push them from the back. Just remember which is left and which is right.
The rubber feat and logo can also be pushed out from the back. The feat were a little tricky, I gave them a little push from my trusty guitar pick and a bit of a pull from my swiss army toothpick. You shoud be able to get these out eventually.
The camera lense casing is only held on by some double stick tape. similar to the tape on the back of the logo, but there is lots of it. I removed it by pushing it out from the inside as well. You can remove the actual lense from the silver casing as well if you choose, I did because I wanted to fix the dings and dents in mine then paint it.
Optional: there is a screen on the inside of the front cover where the earpiece is. I removed it, but I don't think much paint would get in there, especially since I masked that area off.
Step3:
I used masking tape and my Xacto to cut perfect masks around that silver piece where the speaker is, over the sticker in the battery area that has product info, and for the power button and IR cover.
Step 4:
Painting!
Paint however you wish. I used and acrylic primer on all the parts then acrylic model paint followed by several coats of semi-gloss clear acrylic. This gives the phone a nice, shiny and durable finish. I used acrylic because I am most accustomed to using it with my airbrush and it is easy to clean up with rubbing alcohol if there are issues.
Some final photos:
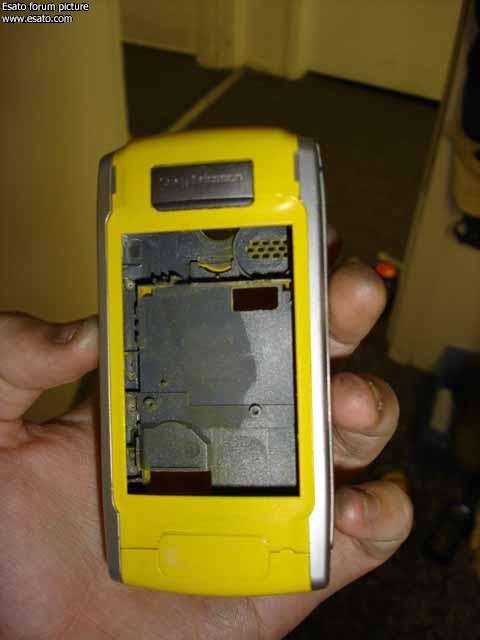
I haven't put the painted case back on my P910 yet, but I will soon.
_________________
My Digital Art Gallery
P910 cover removal and painting FAQ
[ This Message was edited by: knight4led on 2005-05-27 01:28 ] |
|
|
axxxr
Joined: Mar 21, 2003
Posts: > 500
From: Londinium
PM, WWW
|
Nice work.....great customising project!  [addsig]
 |
knight4led
Joined: May 27, 2004
Posts: > 500
From: Califonia, USA
PM |
Thanks. Now I just have to summon enough courage to pull my phone apart again and put my colorful new housing on there.
|
Residentevil
Joined: Feb 29, 2004
Posts: > 500
From: Raccoon City, USA
PM, WWW
|
Good Work.
Tough times don't last, tough people do!
Free Tibet |
dekesh
Joined: Jun 28, 2004
Posts: > 500
From: London, UK
PM |
top stuff!  [addsig]
 |
p900userabuser
Joined: May 26, 2005
Posts: 4
From: IL USA
PM |
Black P900
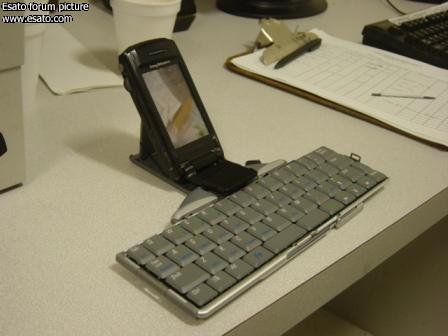
front
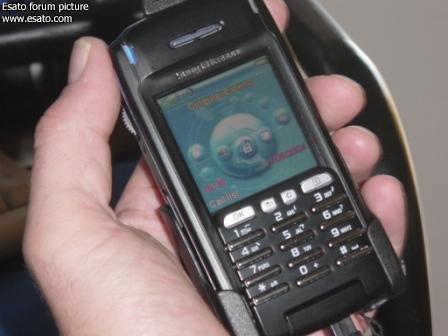
back
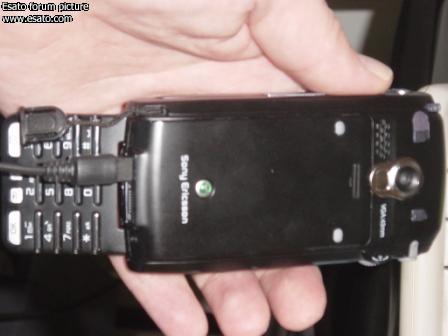
A Nice Mobile combo, All matching in there original colors!
P910a smartphone;
HBH 300 bluetooth headset;
Stowaway Universal Bluetooth Keyboard
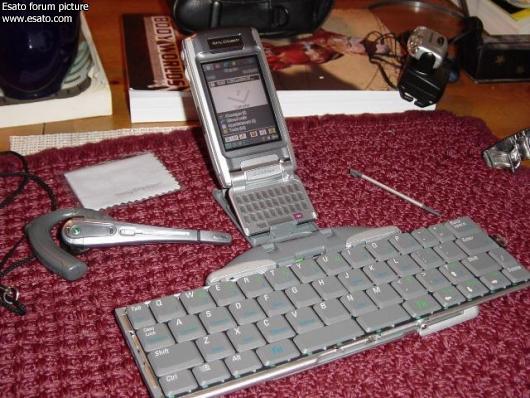
Keyboard
http://www.thinkoutside.com/stowawaybt_product.html
Phone
http://www.sonyericsson.com/s[....]10185&zone=pp&lm=pp1&pid=10185
Headset
http://www.sonyericsson.com/s[....]1_1&zone=pp&lm=pp4_1&pid=10189
[ This Message was edited by: p900userabuser on 2005-05-27 21:38 ] |
vx220
Joined: Mar 19, 2005
Posts: 109
PM |
dont bother using primer on pxxx resprsy jobies just lightly wet and dry it |
Merc_Man
Joined: Feb 24, 2004
Posts: > 500
From: U.K
PM |
WOW! Great guide matey, book marked right away, keep up the good work!
|
corrado85
Joined: May 16, 2005
Posts: 270
PM |
damn those are ALOT of parts you have to move. very fragile n delicate while at it:( |
p900userabuser
Joined: May 26, 2005
Posts: 4
From: IL USA
PM |
knight4led
Incredible job! Want to see how it looks now that is is all back together. Pic? |
knight4led
Joined: May 27, 2004
Posts: > 500
From: Califonia, USA
PM |
haven't put it all back together yet. I will post pics eventually when I put the yellow cover on.
@everyone thanks for the positive feedback |
Lawin
Joined: May 01, 2005
Posts: 9
PM |
I can't see the images. It says "Login to Esato to view these images" but I am logged in. Is there a PDF version and where can I download, plz. |
Tyger
Joined: Jan 15, 2005
Posts: 108
From: Germany
PM, WWW
|
Wow, very well done tutorial knight!
I'm really tempted to give my SE a great new look...but i guess
i don't have the balls to disassemble it ,-)
Regards,
Tyger
http://www.jamboni.de (<-- Pxxx Skins available) |
knight4led
Joined: May 27, 2004
Posts: > 500
From: Califonia, USA
PM |
haven't put together a pdf version, might try something like that in the near future, but for now the tutorial is only on esato.
|
corrado85
Joined: May 16, 2005
Posts: 270
PM |
so any more updates or is that yellow-piss color if ur final? |
|
|


 Posted: 2005-05-27 01:54


