| Author |
P990 disassembly - Speaker not working after drop |
Popolou
Joined: Nov 30, 2002
Posts: 175
From: London
PM |
Guys, could do with some info here. My dumbarse fool of a brother decided to throw the phone towards me and being such a gay throw it dropped and slid along the floor. Now, the external speaker doesn't work.
Anyone had a similar experience and can shed some light? I'm just about to look for some dissasembly instructions now.
Thanks
Popolou
[ This Message was edited by: Popolou on 2007-02-10 23:00 ] |
|
|
willo
Joined: Sep 21, 2006
Posts: 163
From: Liverpool
PM |
did you take out 'phone insurance?
I dropped mine yesterday and it bounced down a set of concrete steps. Theres a couple of scratches on the flip, so I guess I got off lightly compared to you. Make sure that you kick the s**t out of your brother! |
Popolou
Joined: Nov 30, 2002
Posts: 175
From: London
PM |
Kicking the shit out of him is always on the cards.
Anyways, couldn't find a site with the tear down details so went ahead anyway. The thing is in pieces and i think i found the problem.
Will let you know if it springs back to life.... 
Regards
Popolou |
willo
Joined: Sep 21, 2006
Posts: 163
From: Liverpool
PM |
Good luck mate! |
Popolou
Joined: Nov 30, 2002
Posts: 175
From: London
PM |
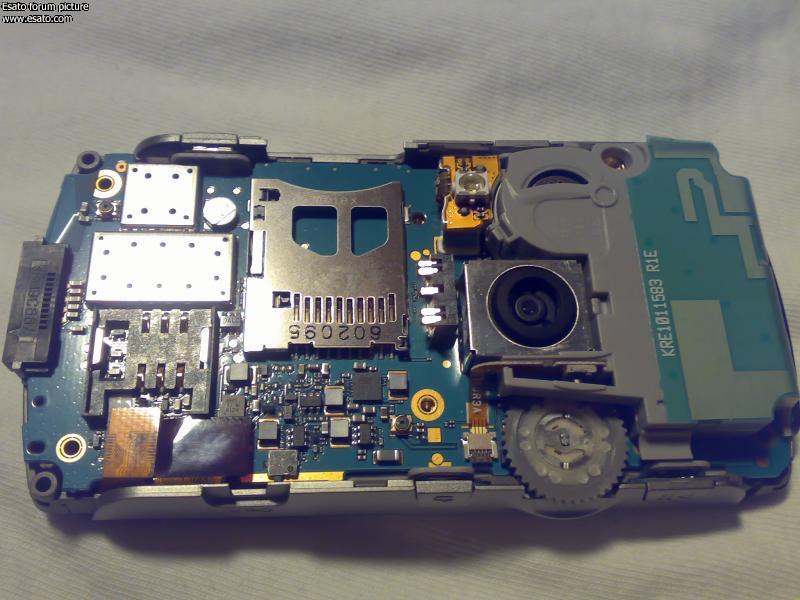
Success!
After taking the thing apart and understanding how it's put together i noticed that the speaker is connected via spring terminals like pretty much the other off-board components such as the vibrator.
Removing the rear cover and battery, there are two small silver torx screws at the top of the compartment. These screws hold the mainboard to the external components tight making the connections via the spring terminals.
I noticed when disassembling that these screws had been worked loose and therefore not creating sufficient compression between the components (in this case, the speaker).
I'll attach some pictures i took (just in case) since this may prove useful to others undertaking the same.
Regards
Popolou |
smilerthe cheshirecat
Joined: Oct 22, 2003
Posts: > 500
From: Cheshire, UK
PM |
Are you posting some piccies then? 
|
Popolou
Joined: Nov 30, 2002
Posts: 175
From: London
PM |
What a pain it was to Bluetooth them from a Nokia N73 to the P990 then save them to a folder whereby i can access them via the USB.....!
Ok, you'll have to excuse a few of the pics; my digital camera wasn't expecting this and nor was i really!
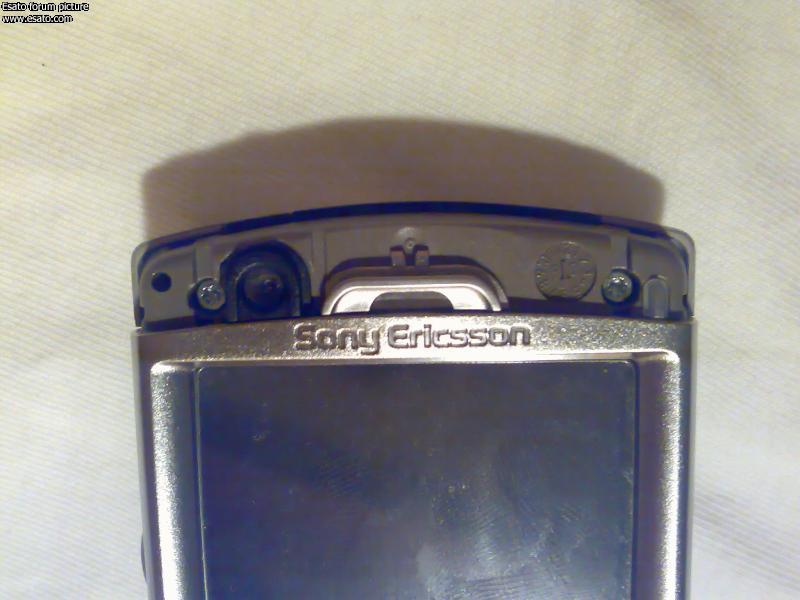
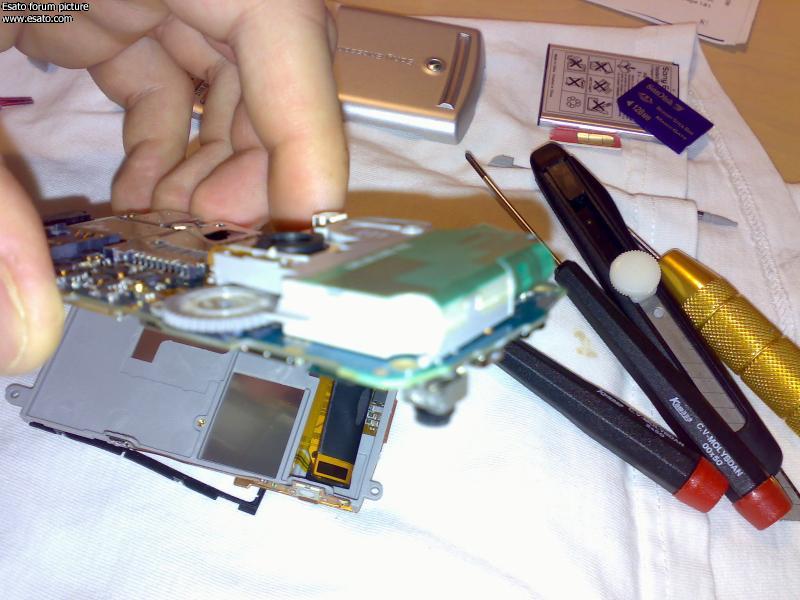
^ The hidden screws that need removing prior to splitting the case.
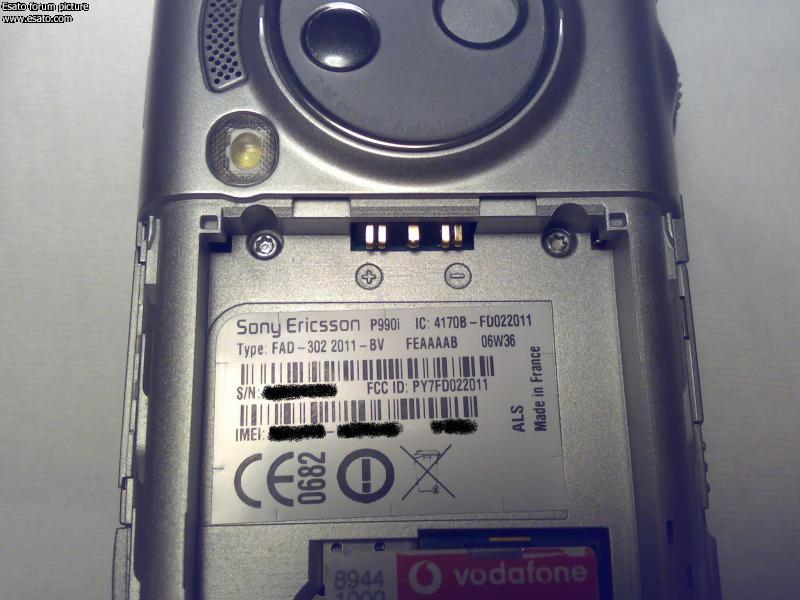
^ The screws that hold the internal components firmly against the PCB. This is vital for the speaker to operate.
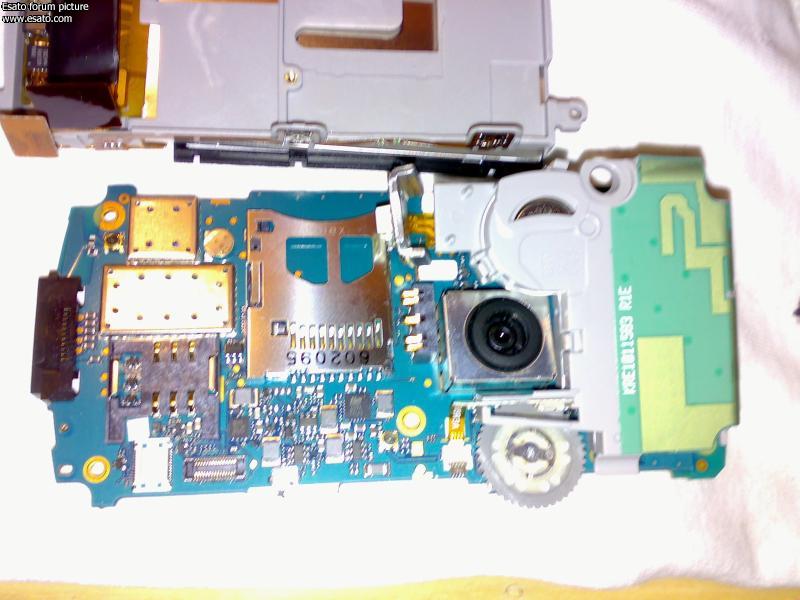
^ Simple shot of the PCB backside. Note the flash (at the top of the pic) was sperated and held back. Be careful as these ribbon cables are very fragile.
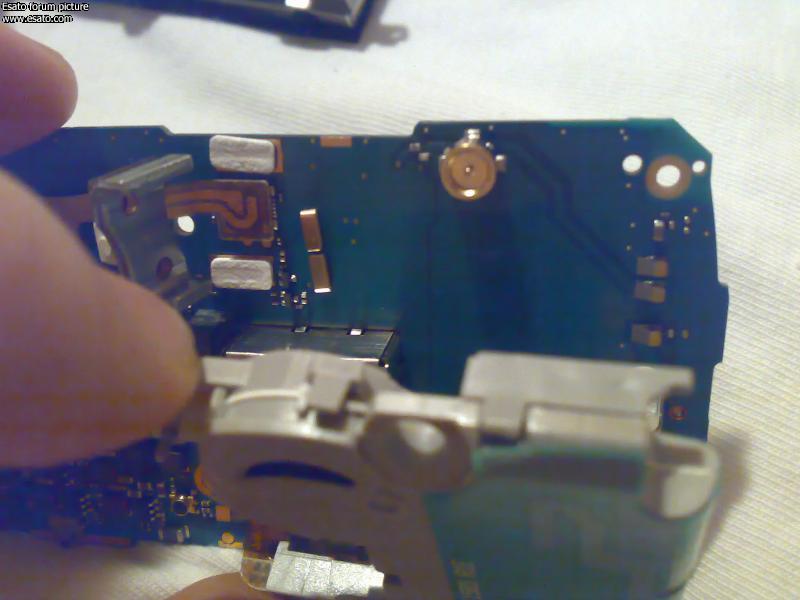
^ Close-up of the speaker terminals to the left.
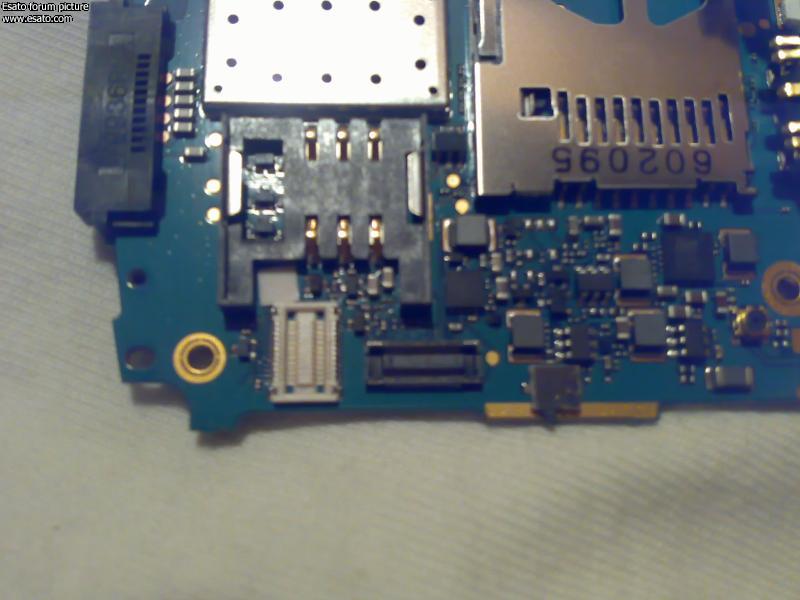
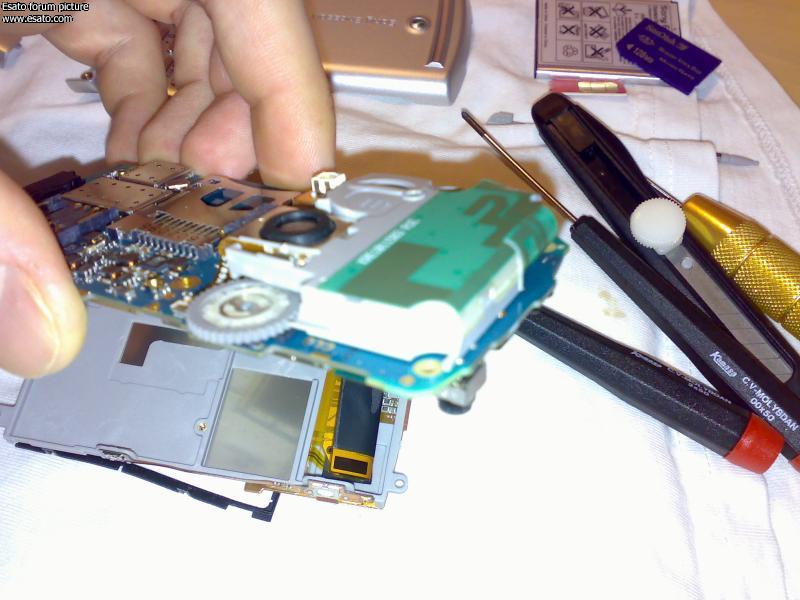
^ Sim holder and connections - the screen connector is the brown one while the white is for the keyboard.
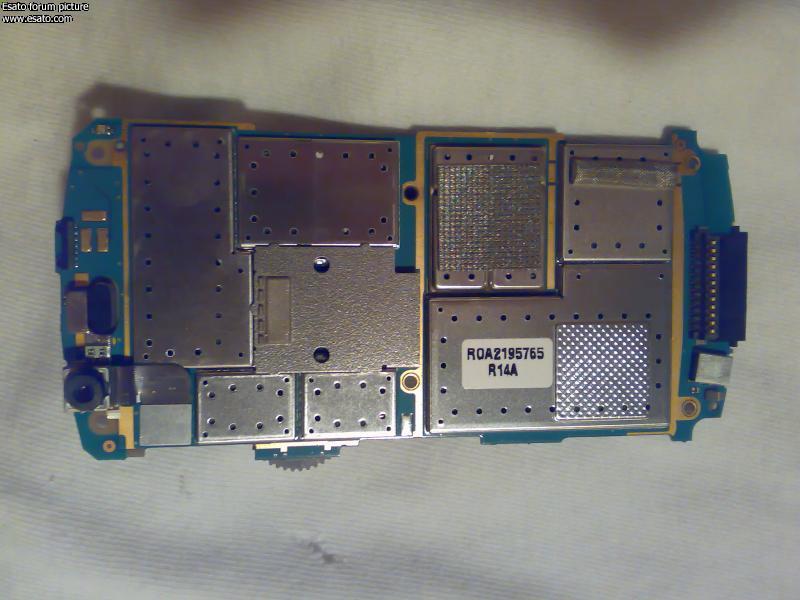
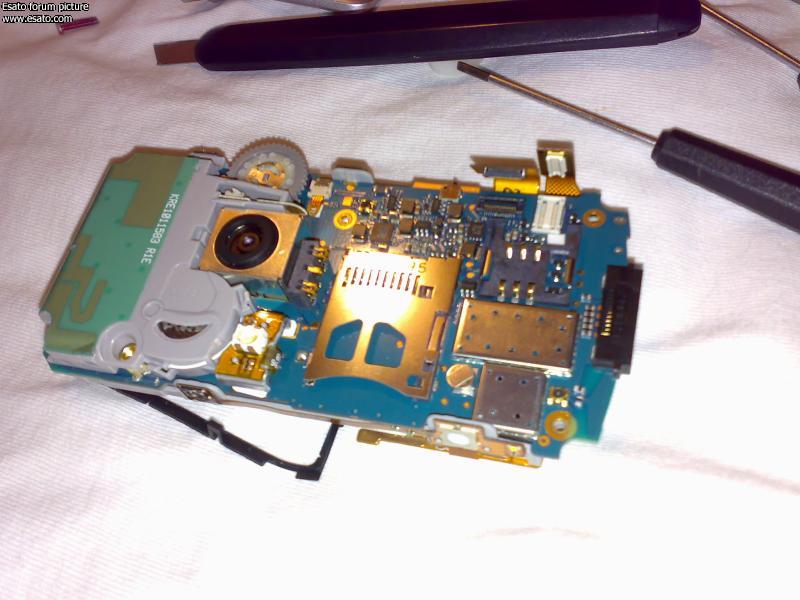
^ Topside of the PCB. Note the vibrator terminals on the left.
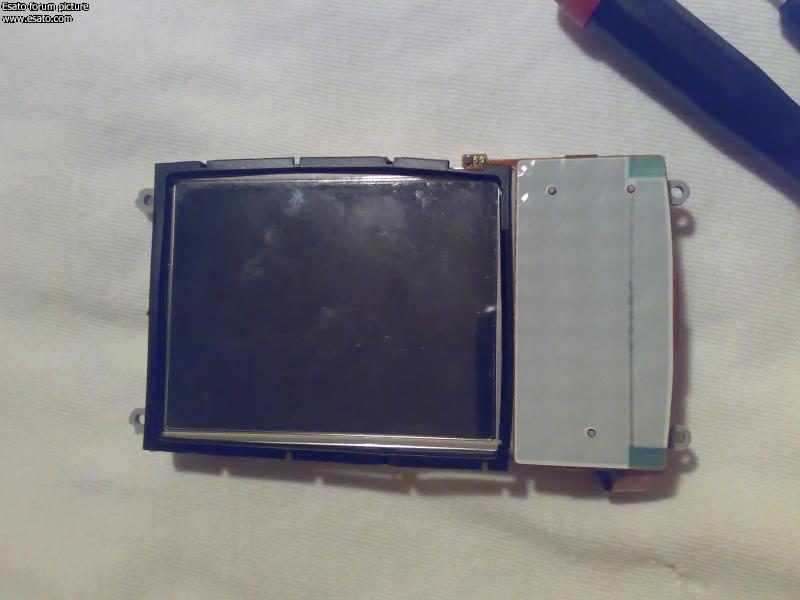
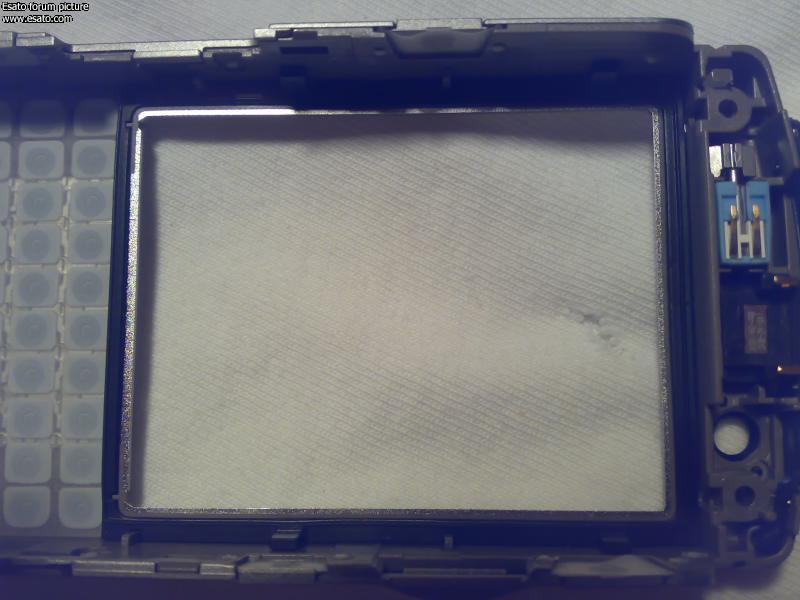
^ Screen and keyboard. Note the rubber membrane is still attached.
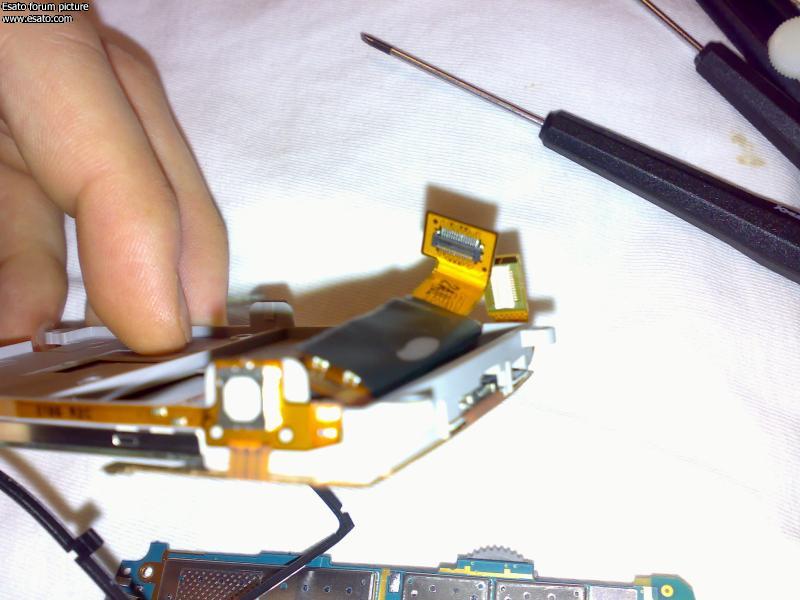
^ Connections for the screen (brown) and keyboard. Note the camera button in the foreground albeit out of focus.
^ Close-up of the antenna and casing. The case was glued and sealed shut using tabs so was not easy to split open.
^ Another shot of the case. The white seal doesn't show too well unfortunately.
^ The screen/keyboard unit offered up to the PCB. Note the screen and keyboard connections.
^ The rubber membrane is fitted into the trim fascia and sits snugly in place. Note the alignment tabs at the bottom of the fascia piece.
^ The PCB and screen/keyboard units sitting within the front fascia. Note the flash is now in its final resting position.
Well, i hope the pics may come in useful for anyone else undertaking a similar job. I wasn't really expecting for all this to happen tbh, but all's well that ends well i guess 
Regards
Popolou
[ This Message was edited by: Popolou on 2007-02-11 00:23 ] |
tsh
Joined: Aug 18, 2006
Posts: 72
PM |
One important note, the small white blobs under the flash support look like thermal conducting foam - don't loose them or the flash will overheat!
Great set of photos though! |
R1
Joined: Sep 29, 2005
Posts: 39
PM |
Props on the bravery of taking the phone apart and great pics. Is it all back together and functional? |
firetech
Joined: Dec 09, 2006
Posts: 295
From: Lund, Sweden
PM |
@tsh:
I somehow doubt that, the heat doesn't have anywhere to go... Also, the P990 flash is a LED one. They don't dissipate that much heat.
P990i (GW1) + 4GB MS
This signature is (probably) brought to you with the help of HTTP. |
Popolou
Joined: Nov 30, 2002
Posts: 175
From: London
PM |
Yes it was a surprisingly easy job to get it apart and the only problem if anything was to ensure not to damage those softer plastic parts.
Another point that i mentionned in the post and really should stress again is that really to take caution when working with the small ribbon cables. If the material is 'worked' too much they can begin to split. Once that happens, its all over.
I'm glad to say that without any exterior markings and all the screws tightenend up, it feels as if it were out of the box. 
Regards
Popolou |
tech13
Joined: Jul 11, 2007
Posts: 1
PM |
hey pop, im taking my phone apart to replace the digitizer (touch screen). now I notice the screen is "whole". I only managed to take out the guts of the system, not dissasemble any of it, I had a few questions for you.
1, once the case is open and removed, as well as the screen rubber, how do you remove keyboard to get at the screen connections to remove the screen, once screen is removed how do you take off the digitizer and leave the LCD alone? need to have my scratched LCD replaced. also I had some trouble with stripped torx screws but I managed to create my own custom bit and remove it although it was not easy, I also created a thread how to create this custom bit piece as well. |
Sainty
Joined: Nov 30, 2004
Posts: 485
From: UK
PM |
Nice disassembly tutorial mate I'm sure that'll come in useful at some point!!! Cheers
Sainty - Ex Vodafone Sales Advisor
Nokia 402 -> Nokia 3310 -> Nokia 3510i -> Nokia 6100 -> SE V800i -> Samsung D500 -> SE K750i -> SE W900i -> SE K800i -> SE P990i -> SE K850i -> SE W960i -> SE C905i -> SE X10i |
mode
Joined: Jan 12, 2007
Posts: > 500
PM |
This thread came just a tad bit too late for me. I fell into a pool last Saturday. Yes, you know what I brought with me with that fall. I just couldn't figure out the last 2 screws (like from the FIRST pic, ironically) so I just unscrewed the other six and kept it halfway ajar with tissue, hairdried whatever parts I managed to expose and waited till Monday to send it to the service centre as none was open over the weekend. Everything was badly rusted but it remains in working condition surprisingly. I might have to sell this one off soon and get another before it's too late. Dang! |
jackanova
Joined: May 09, 2006
Posts: 11
PM |
valuable thread, But im not able to see the Images..
My camera button has some dust in it need to clean it up but don't know how to proceed.
ESATO, Please help I need images in this thread . |
|
|


 Posted: 2007-02-10 22:28


